If you are looking for a quite and easy way to edit social media templates such as the Instagram templates found in our Template Pack, but don’t have access to PowerPoint, Photoshop or other programs, Google Slides can be a great option.
If you have a Google account, you will have access to Google Slides and this application has been developed to produce, as the name suggests 😉 slides for presentations. It can, however, also be used to make some quite nifty social media graphics and images which can be used for a variety of purposes.
In this tutorial we’re going to look at how to use Google Slides to edit ready made social media templates.
How to Edit Social Media Templates in Google Slides
So first, make sure you have the template you want to edit and have decided what the theme of your graphic is going to be.
In this tutorial, I am making a graphic to promote a book for young English learners, so I have included a picture of the cover. However, I could equally have used the same template to create an Instagram graphic with a quote, or add a photo to the graphic.
In our ready made templates, you will see that many show a student pointing, and this will help draw the viewer’s attention to this area. Therefore, keep this in mind when designing your graphic as this is the area where you want to add key information or a call-out.
1/ Create a New Slide
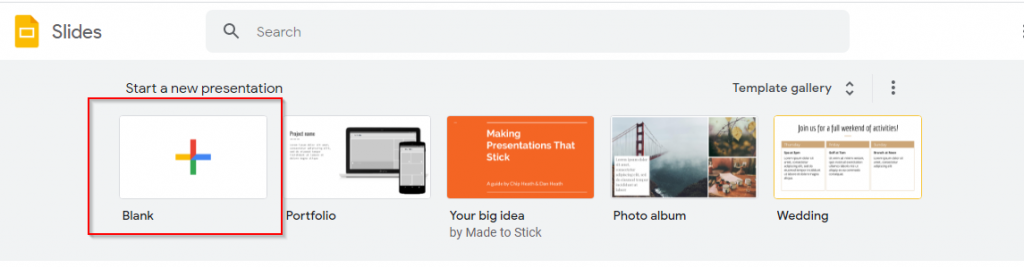
Start by creating a new presentation. You will see there are several templates to choose from, however we want to select the blank option and create our own custom size.
2/ Go To Page Setup
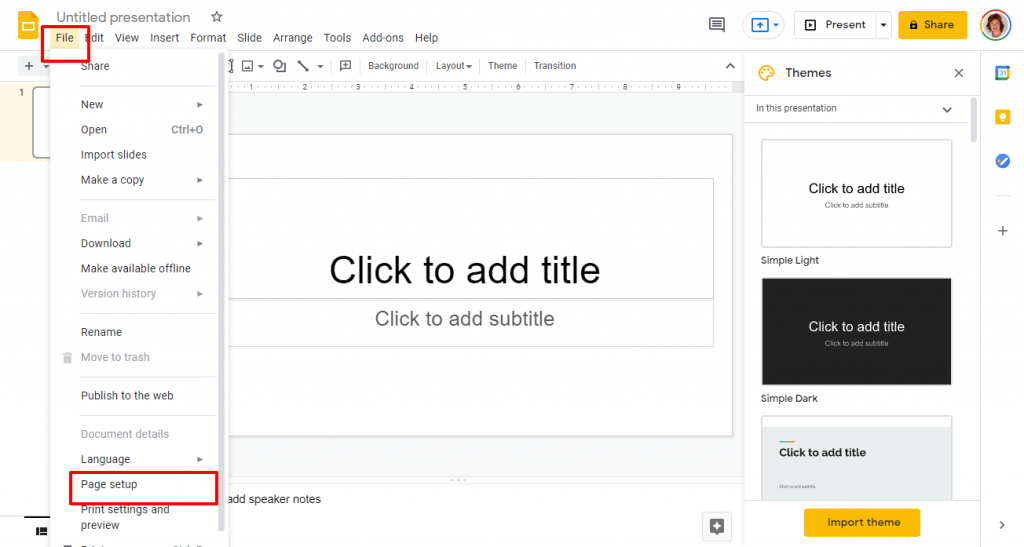
Navigate to Page Setup to change the size of the slide. To do this, go to File > Page Setup.
3/ Change Size of Slide Background
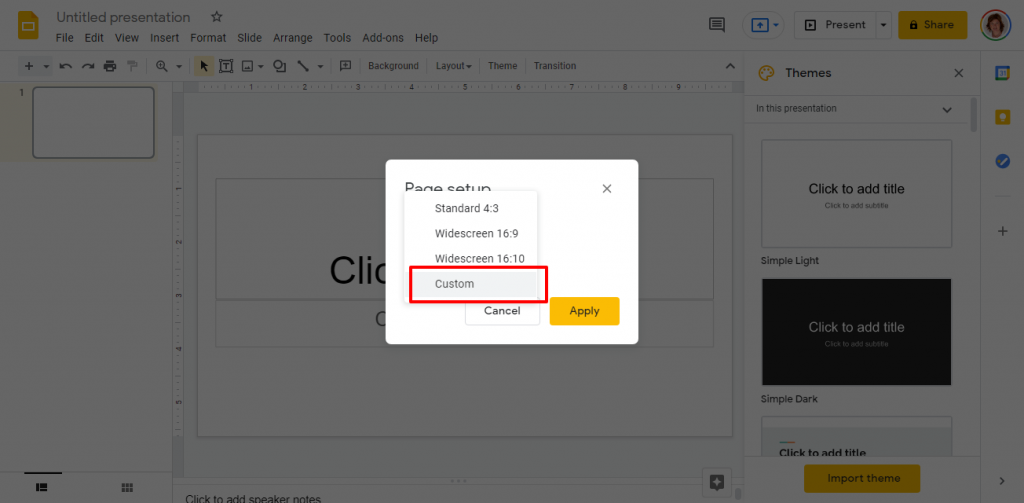
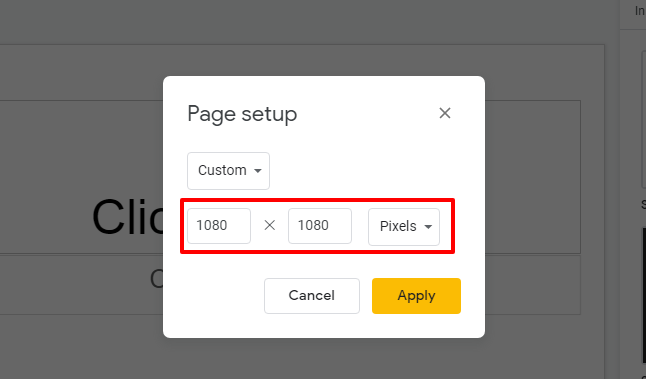
Select ‘Custom’ and then add the size you require. I am using 1080 x 1080 as this is the best size currently (2021) for Instagram posts.
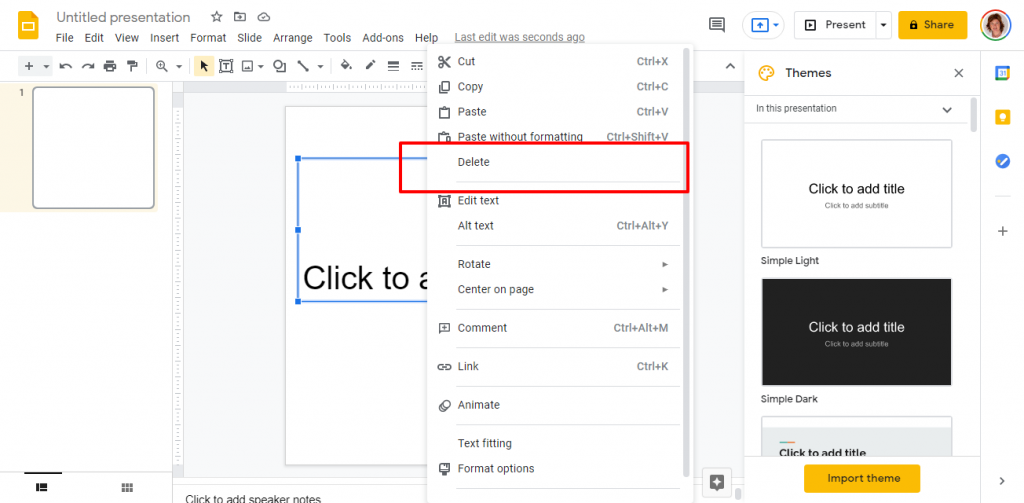
To delete the elements already on the page, click on the element you want to delete and then right click and select ‘delete’.
4/ Import Template
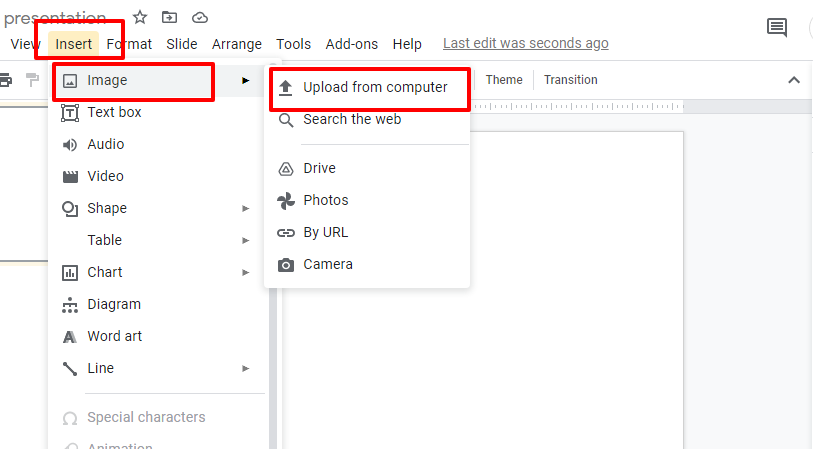
Now it’s time to upload our template! Click on ‘Insert’ and then choose Image and Upload from Computer. Navigate to where you have saved the templates and pic a template from the pack (remember to unzip the folder before trying to upload the image).
5/ The Template
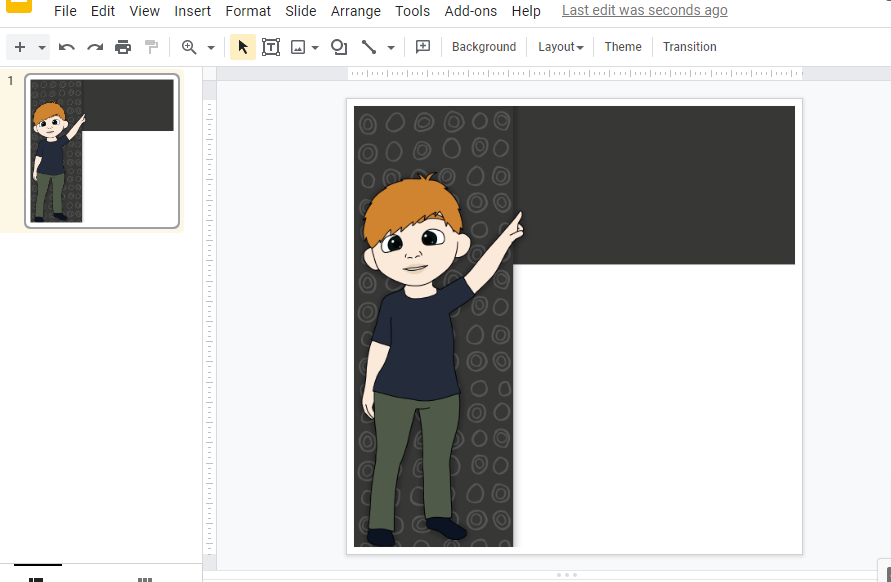
You will notice in our template pack that some templates have transparent panes, where you can add an image behind or are made of completely opaque pieces where you can add another image or graphic in front.
The key difference between the two is that when you add an image, for example a photo, behind, you don’t need to worry about cropping the image exactly to size. It also allows you to layer graphics as we are doing here, by adding the colored panel behind and the image of the book in front.
Another benefit of the transparent panels is that you can add different colors, photos and patterns behind the graphic to give your social media graphics a cohesive, but varied look.
6/ Add a Background
The template we are using has a transparent panel so we’re going to add a colored background. One way you can do this is to simply create a square shape, and add that to your graphic. However, we’re going to add one of the colored shapes from the template pack. While we’re using one of the graphics from the template pack, you could also use a photo, another graphic, a piece of patterned ‘digital paper’ etc.
Add the new element in the same was as we added the template. Go to Insert > Image > Upload from Computer and add your image.
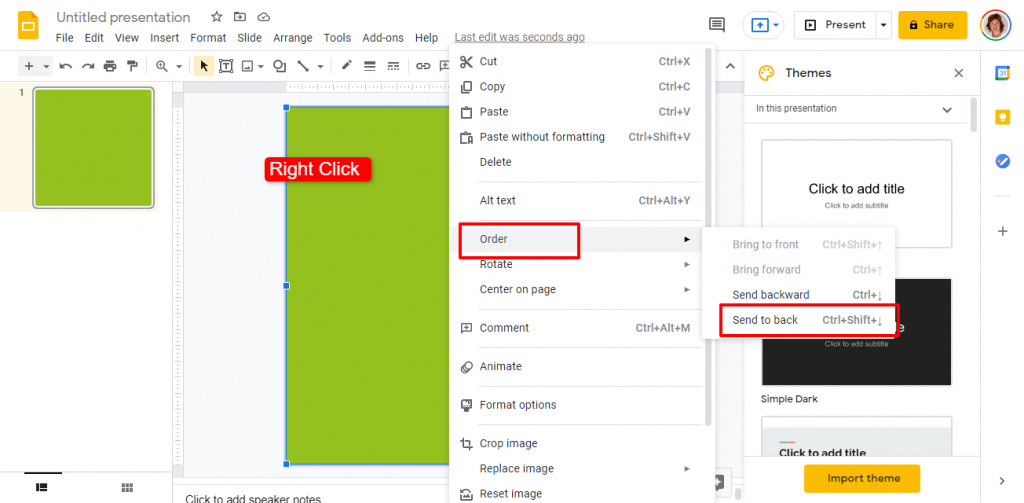
You will see that this has been added on top of your template. To change the order of the elements so the green panel is at the back, just right click on the green pane and select Order > Send to Back.
To add a graphic to the top, for example a couple of pages from the resource or a book cover as I have done, just repeat the process by importing a graphic onto your slide.
7/ Add a Text Box
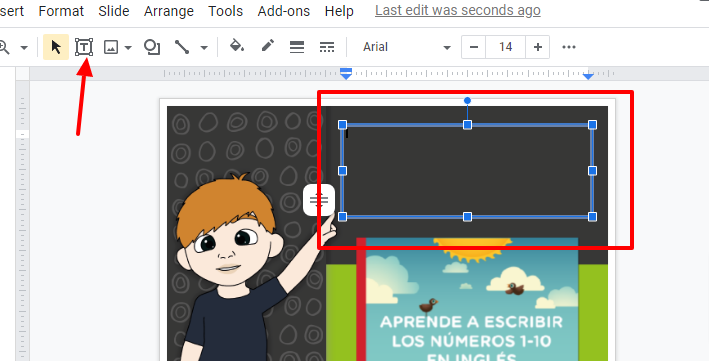
Now we are going to add a text box. Select the text tool from the top menu bar and drag this into position.
8/ Format the Text
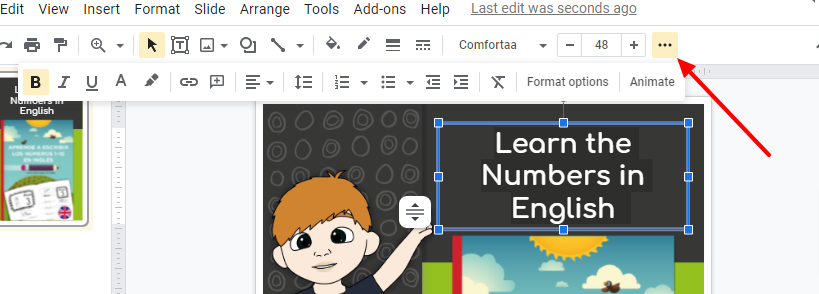
Change the font, size and color using the options in the menu bar at the top. You will find other format options under the three little dots at the top right of the page.
9/ Download Your Graphic
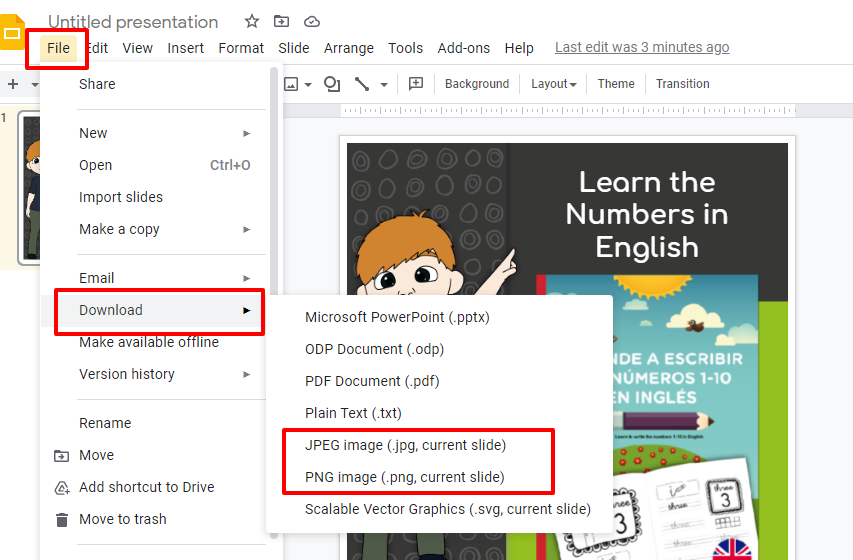
When you are happy with how the graphic looks, you can download it. To do this, go to File > Download and choose either JPG or PNG and download the graphic to your computer.
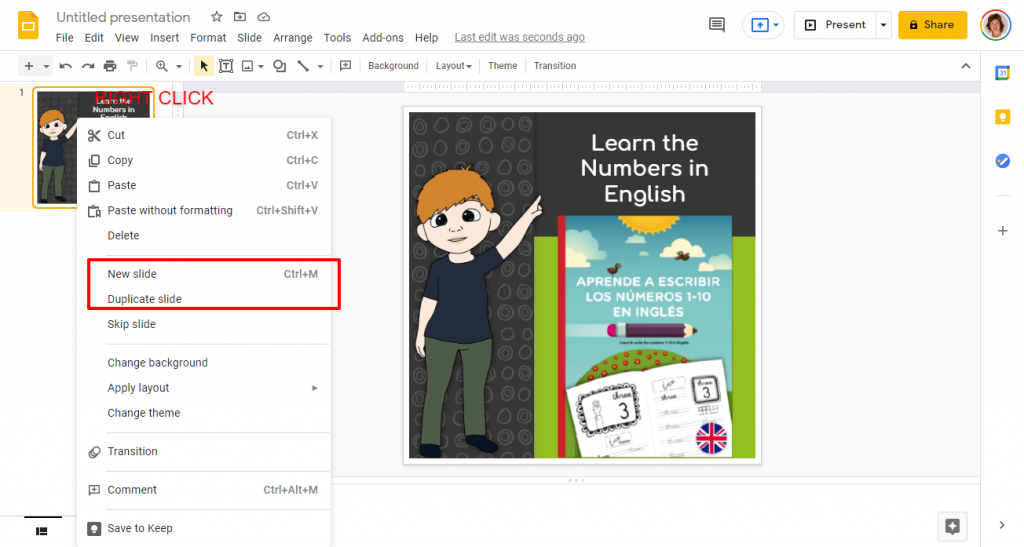
You could keep this slide file as a master file and create new slides each new graphic. This is easy to do by right clicking on the preview in the sidebar and then selecting ‘New Slide’ or ‘Duplicate Slide’. If you create a new slide it will create a slide in the same size as the previous one, but you have to delete the elements which are pre-populated on the page – or if you duplicate the slide you will have to delete the elements you have already added, however you could keep the text box, which might save a bit of time.
Tips for Making Social Media Graphics Using Templates
Here are a few tips for using templates to create your social media graphics:
- Remember you can flip the template to create a different look (right click on template and select ‘rotate’ and you will see the flip options)
- Add your logo if you want to create brand awareness, but don’t make your logo the main feature of the graphic
- The characters on our templates are pointing to a place on the template to take someone’s eyes to that point – add the things you want your viewer to see the most here