If you have downloaded our free memory game for your website but aren’t sure how to create the back faces for your cards, I’m going to show you how to make custom back faces for your cards using the free browser based vector application, vectr.com
This is quick and easy to do, however, if you are familiar with another graphics package, whether Photoshop, Illustrator, Affinity Photo or Designer or even Canva, feel free to ignore this and create your cards in which ever application you are most comfortable with.
On the other hand, if you don’t currently have a graphics application you like working with, I recommend vectr.com as it is free (yey!), browser based (so no software to download) and it’s vector based, which means we can create scaleable graphics.
Create Custom Memory Cards
We need two sets of graphics to customize the memory game. We need the card faces – and we need 12 different designs for these, and we need a single graphic for the card back. This is what the player sees before they click on a card to turn it over.
The graphics for the card faces and the graphic for the card back must be the same size and dimensions.
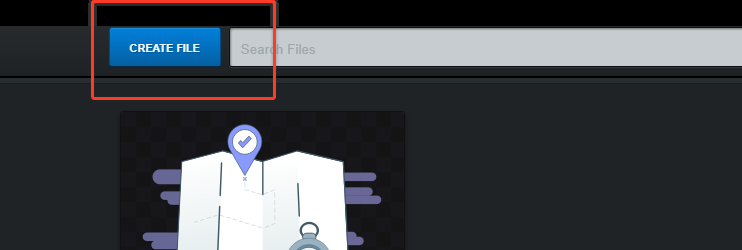
Go To Vectr.com
To start, head to vectr.com. Register and click on ‘Create File’.
This will open up the graphics interface.
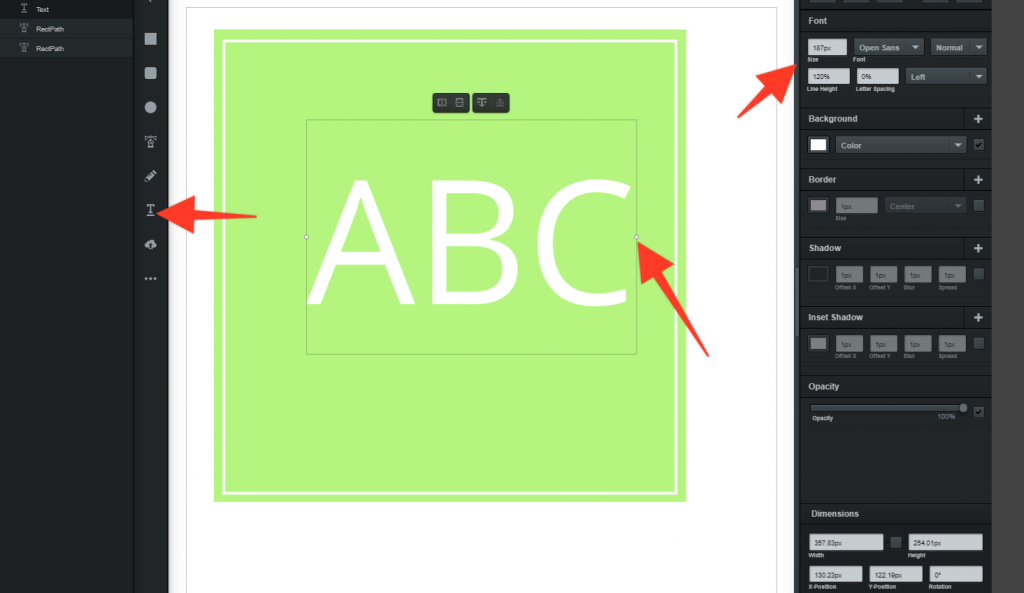
We want to create a square for the back of the card. To do this, select the square shape icon (left hand tool bar) and drag a square onto the canvas.
Tip: Hold the shift key to maintain the proportions while dragging the square.
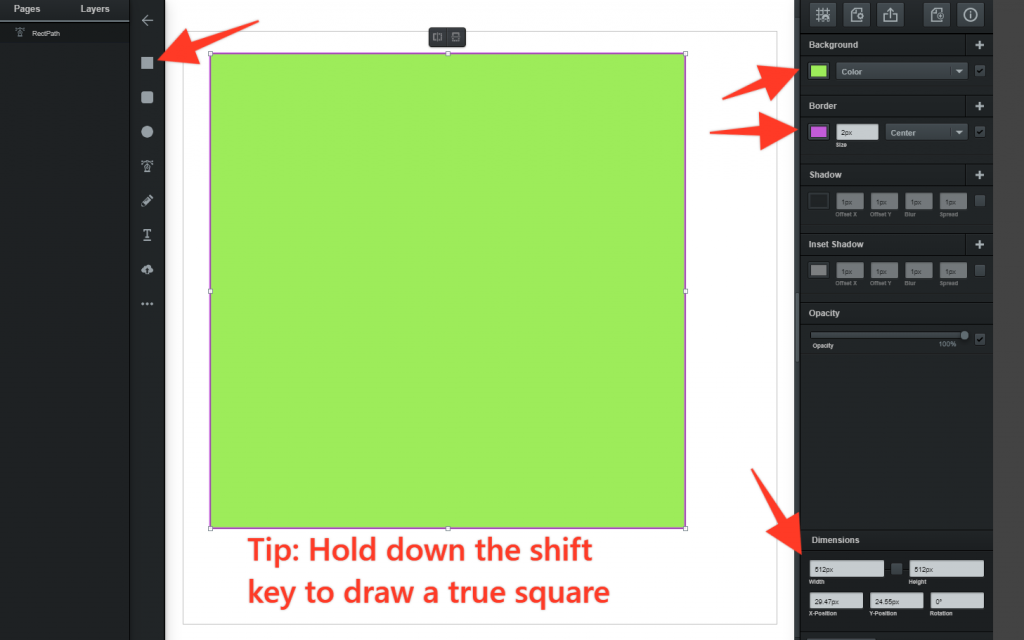
On the panel on the right hand side, you will see you can change the color of the shape, the border color and width (or turn the border off completely) and at the bottom right, you will see you can adjust the pixel size of your shape.
To give the back of the card some interest, I’ve created an inset border. To do this, simply create another square over the top of the original one and set a white border and adjust the pixel setting to give the width you desire.
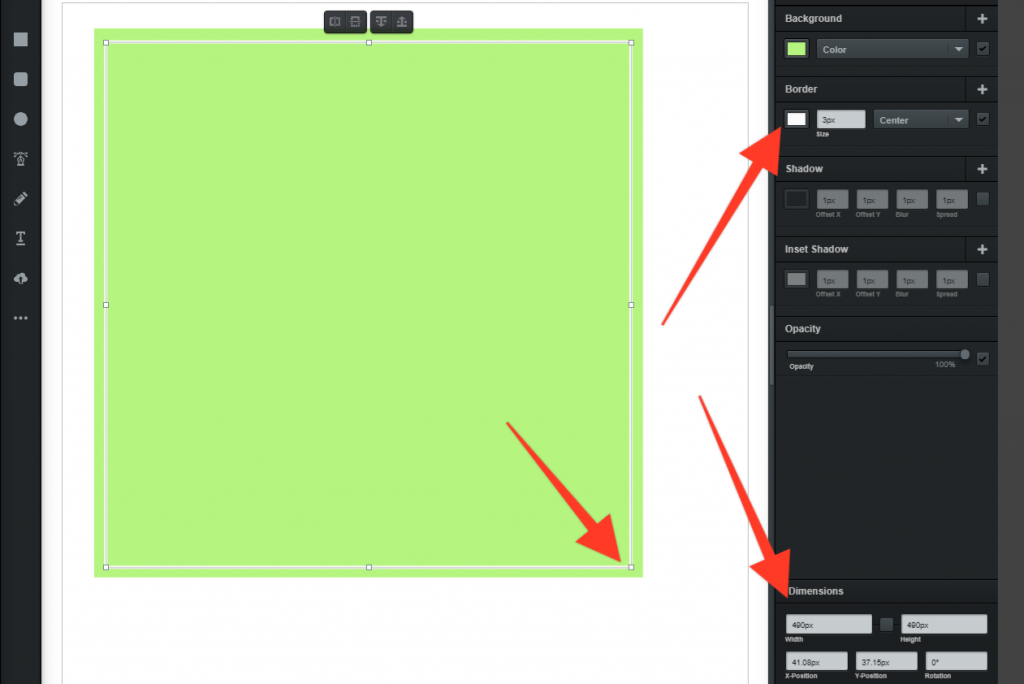
Adjust the size of the inner border by dragging the little box handles in the corner of the shape or type a number into the dimension box at the bottom right of the screen.
How To Add Text
If you want to add text, just click on the text icon in the tool bar on the left and drag this where you desire the text. You will see the text edit box opens at the right top. You can change the color, font etc here.
You can also resize the text by dragging on the little square handles at the side of the text box,
To Delete an Element
To delete an element, look to the layers panel on the left of the page.
You will see that each element created is on its own layer.
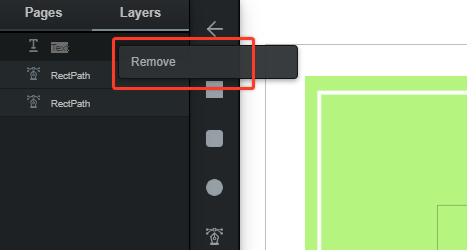
Right click to remove an element, or click on the little eye icon to hide an element.
To Add an Image
If you want to add an image, for example your logo or an image for the front of the card, select the upload icon in the left hand tool bar.
When you have uploaded the image, you will see an image layer is created in the layer panel.
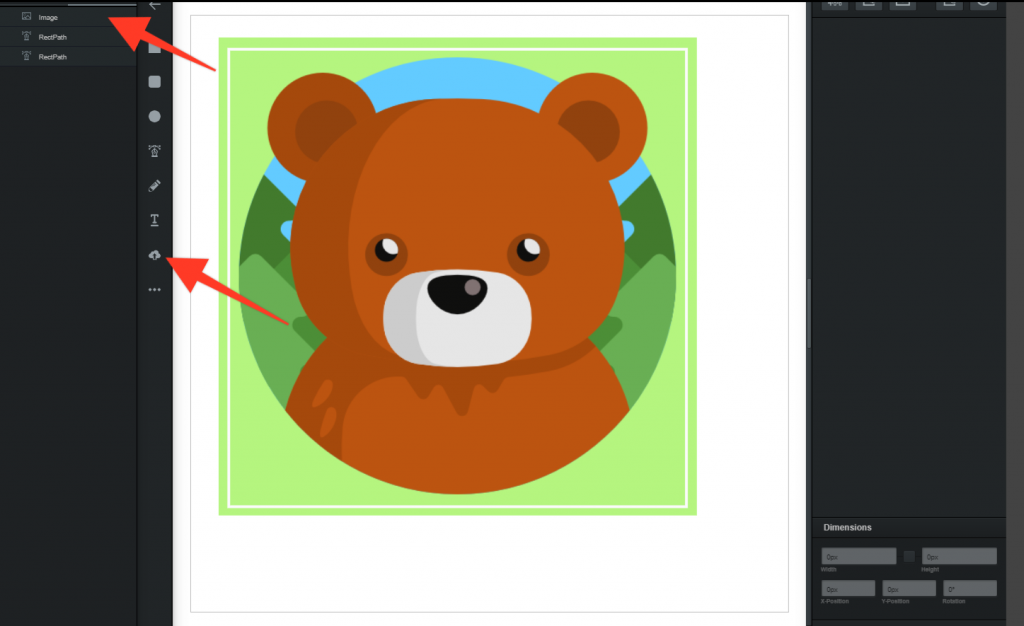
This is handy if you want to use icons to create your memory cards as you can add the icons to a colored background to make a more visually pleasing game.
How to Export
When you are happy with your design, select the whole image (using the arrow tool in the left hand tool bar or select from the layers panel). Click on the export icon at the top right.

This will open the export window:
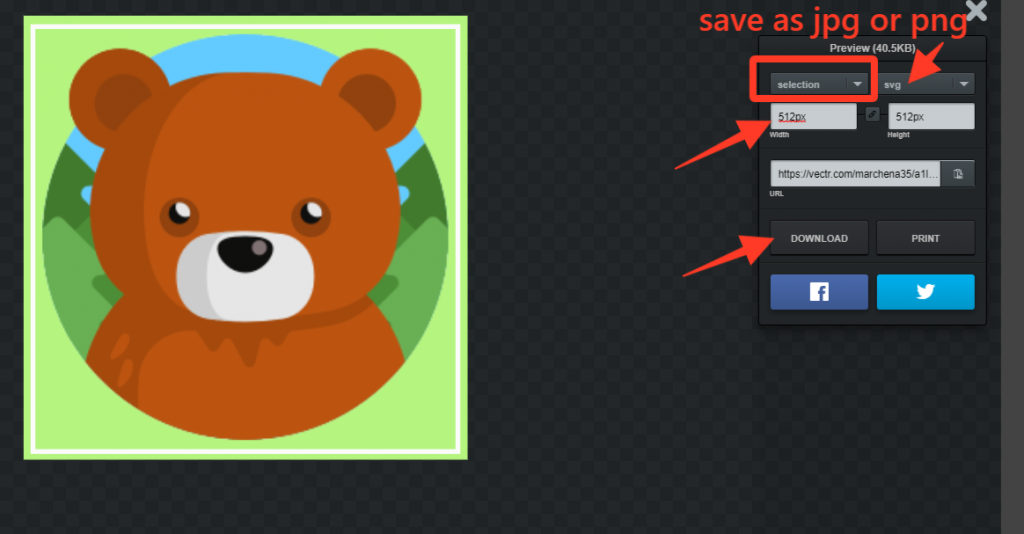
Export settings:
- Export ‘Selection’
- Save as png or jpg
- Check the size of the file is the size you desire
When the settings are correct, download the file to your computer.
Make Connection Cards

Use this technique to create connection cards. These are cards for your memory game where, instead of a player looking for two identical images, they are looking for two connected images. In this instance, a graphic and word, however other options could be words in different languages for language learners, objects and numbers for players to count etc,
We look forward to seeing what memory game cards you create!